How to Convert SVG to 3D
Build a dimensional logo or icon, try editable examples, and save a complete scene for later.
In this guide 8 sections
The SVG to 3D Converter turns vector paths into models with depth, beveled edges, and editable materials. Use it for a dimensional logo, icon, or symbol, then download a GLB model, a rendered image, or a camera animation.
This guide follows the current tool: collapsible settings, 12 editable examples, built-in studio reflections, and scene files that keep your artwork and settings together.
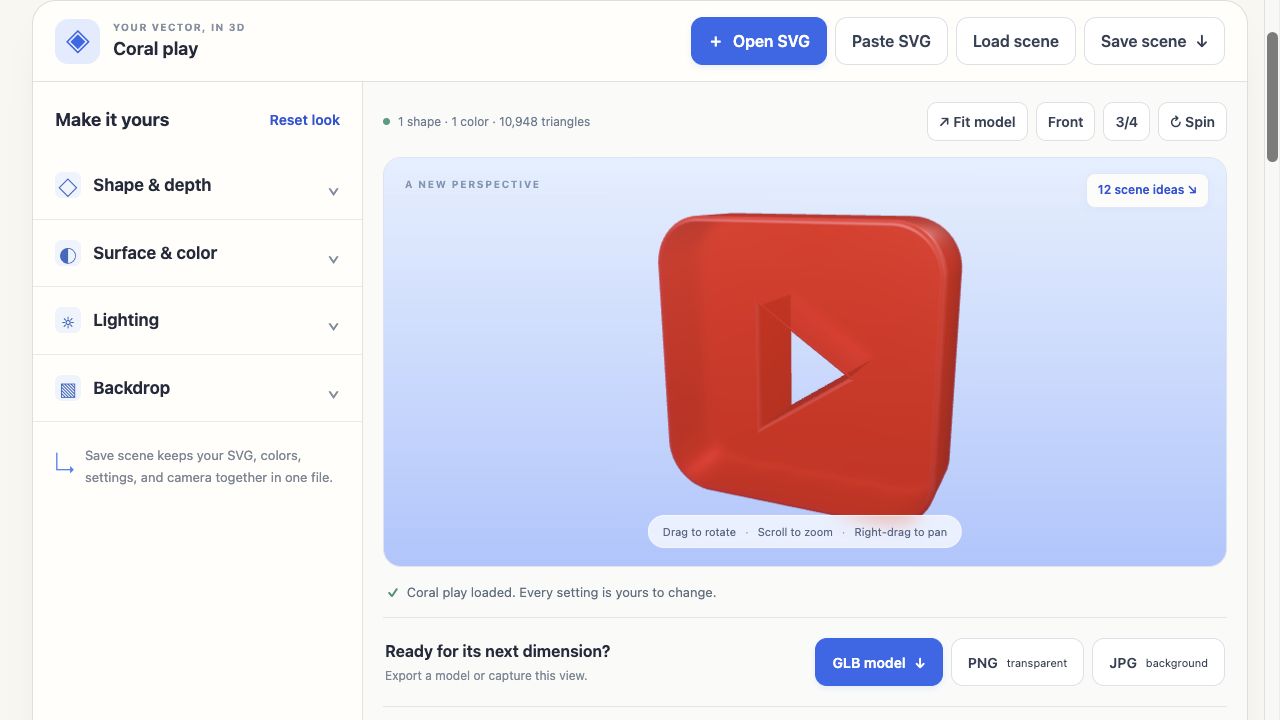
Start with an SVG or an example
Choose Open SVG to select a file, Paste SVG to enter complete SVG markup, or drop an SVG onto the workspace. Filled paths, holes, and visible strokes can become geometry. Model creation runs in your browser; the SVG is not uploaded for conversion.
For a quick starting point, follow 12 scene ideas to the gallery. Its filters cover Glossy, Matte, Metal, Glass, and Graphic finishes. Each example combines a symbol with depth, bevels, materials, lighting, a backdrop, and a camera view.
- Load example opens the example’s artwork and settings. Save your current scene first if you want to return to it.
- Apply this look to my SVG keeps your current artwork and edited colors, then applies the example’s shape and scene settings.
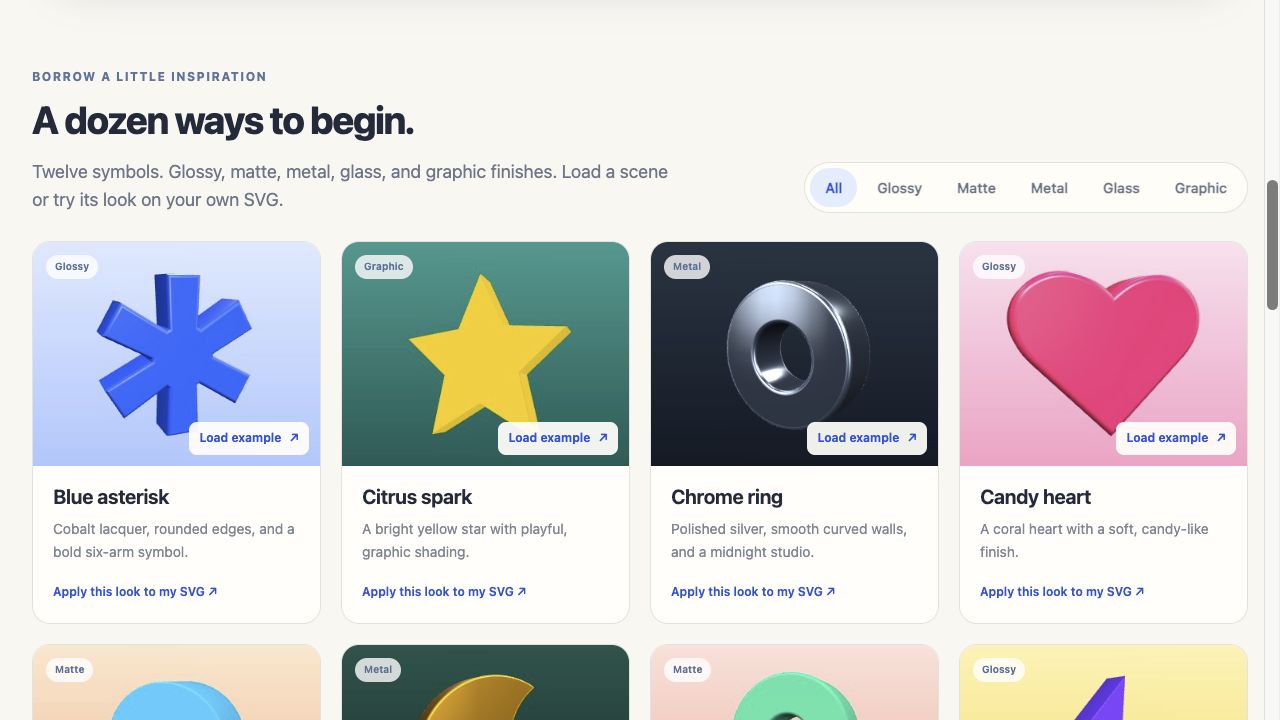
Try Coral Play for vibrant red frosted glass, Chrome Ring for reflective metal, or Outline Cloud to see a stroke converted into a solid object. Every setting remains editable after loading an example.
Shape the depth and beveled edges
Open Shape & depth in the sidebar. All sidebar sections start collapsed; open the one you need.
- Depth determines how thick the extrusion is.
- Bevel width controls how far the edge rounding extends across the silhouette.
- Bevel depth controls how far that rounding extends through the front and back edges.
- Bevel smoothness sets the number of segments in the rounded transition.
Depth and bevel sizes are percentages of the artwork’s largest planar dimension, so small and large source SVGs behave consistently. Start with a modest bevel and inspect narrow strokes, sharp tips, and holes before increasing it. Set bevel width or bevel depth to zero for an unbeveled extrusion.
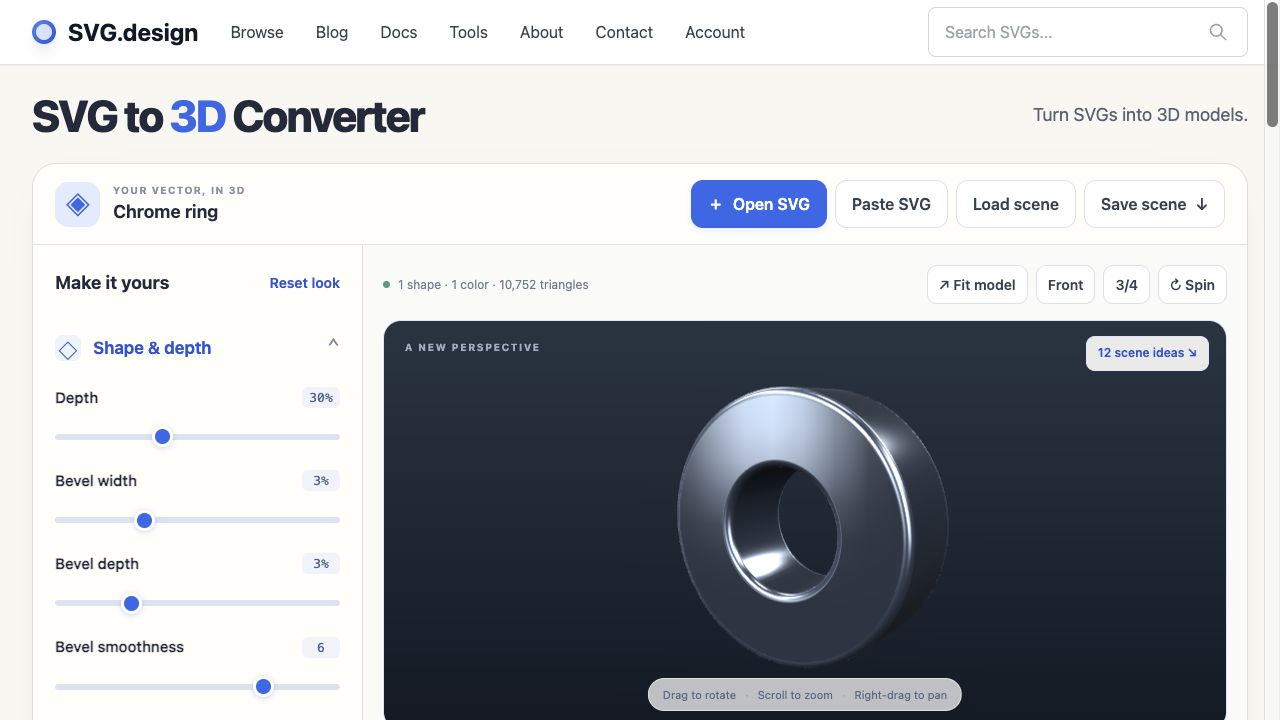
Curved walls shade smoothly while sharp corners stay defined. Bevel controls apply to filled shapes; imported strokes are solidified without these bevels. If a thin feature folds into itself, reduce the bevel or simplify that part in the SVG editor.
Choose materials and colors
Open Surface & color. The material choices are Satin plastic, Standard, Metal, Matte ceramic, Frosted glass, Glossy, and Graphic / toon. Start with the finish closest to your goal, then adjust its surface.
Roughness spreads reflections: lower values look smoother, while higher values make physical surfaces more matte or frosted. Metalness changes the metallic response on applicable materials. Metal and glass benefit from visible reflections; Graphic / toon gives a simpler shaded illustration.
The Artwork colors swatches and hex fields edit detected source colors. You can recolor a model, change its depth, and keep those color edits. Reset colors returns to the imported colors. Reset look restores the default shape and scene styling while keeping the artwork and its edited colors.
Set lighting and a background
Open Lighting and choose Balanced studio, Soft daylight, or Sculptural contrast under Light setup. Use Light strength to adjust the lights and Exposure to change overall brightness.
Reflections is a separate choice. Universal studio is built in and needs no photographic map. You can also select No reflections or a photographic environment such as City, Forest, or Photo studio. Photographic maps are downloaded when selected; if one cannot load, the tool returns to its built-in studio.
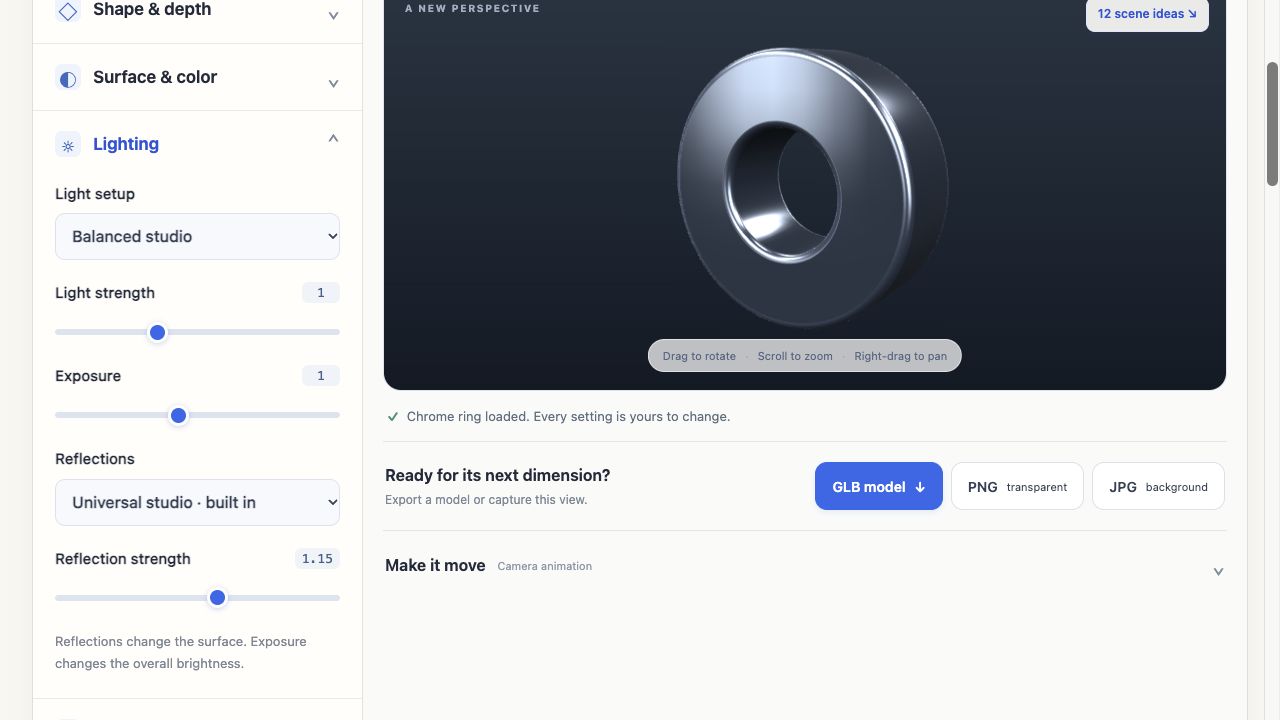
Reflection strength changes the reflective surface response rather than doubling as an exposure control. If a metal looks too dark, inspect its angle and reflections before increasing the brightness of the whole scene.
Under Backdrop, choose Soft gradient, Solid color, or Transparent. Nine color presets include Paper, Sky, Rose, Mint, Peach, Sunshine, Aqua, Forest, and Midnight. You can also edit the gradient’s top and bottom colors. Changing a backdrop leaves the artwork and material in place.
Position the camera
Drag the model to rotate, scroll to zoom, and right-drag to pan. Fit model brings the whole object back into view at the current viewing direction. Front and 3/4 provide useful starting angles; Spin turns the model automatically for inspection.
Check at least a front view and an angled view. The front confirms the silhouette and holes; the angle reveals depth, bevels, and any overlapping geometry. The current camera view is used for PNG and JPG exports.
Save and reopen a complete scene
Choose Save scene to download a .scene.json file containing the imported SVG, edited colors, shape settings, material, lighting, backdrop, camera, and captured camera views. Choose Load scene to restore it later.
Download a scene before refreshing or closing the tab: the 3D tool does not currently autosave drafts. A PNG, JPG, or exported GLB does not replace the editable scene project. Keep your original SVG too if you want to revisit source features that were skipped during import.
Older scene files remain usable as settings applied to an already-open SVG. Those older files did not include the artwork; new scene files do.
Export GLB, PNG, JPG, or WebM
| Format | Use it for | What it contains |
|---|---|---|
| GLB model | Continuing in a compatible 3D application | The model’s mesh and materials. Check scale and appearance in the destination app. |
| PNG | Placing a rendered object over another design | The current view with a transparent background, regardless of the selected scene backdrop. |
| JPG | A presentation image with its background | The current rendered view with the scene backdrop and no alpha transparency. Transparent scenes use a white backing. |
| WebM | A moving presentation of the model | A recorded camera sequence from Make it move. |
PNG and JPG are pixel images, not editable vectors. Their size follows the preview canvas; the status message reports the exact exported dimensions. Save the scene as well when you need to return to the design.
Record a camera animation
- Open Make it move, position the camera, and choose Capture view.
- Move to a different angle and capture another view. Add at least two views, then set the duration beside each one.
- Choose Play to preview the transitions. Select a saved View button to return to that angle, or remove an unwanted view with its delete button.
- Choose Record WebM and keep the tab active until the recording finishes.
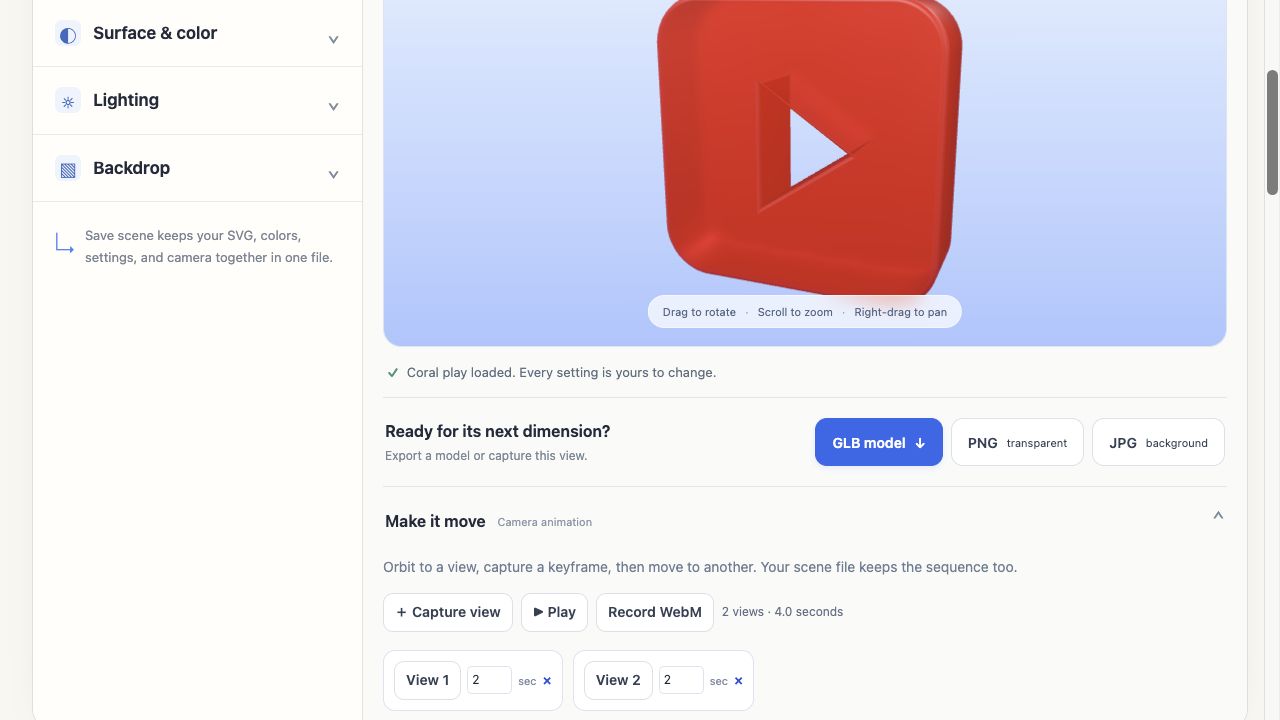
You can capture up to 12 views. Keep a recording at 60 seconds or less; WebM recording also requires browser support. Camera views are saved in the scene file. The GLB export contains the model; use WebM when you want the camera movement as video.
Troubleshoot SVG imports
- Text or a photograph is missing: live text and raster images are skipped. Outline lettering in a vector application, or vectorize an image before importing it.
- A gradient looks flat: SVG gradients use a representative solid color in 3D. Adjust the artwork color and material after importing.
- A mask, clipping effect, or filter disappears: these effects are not reproduced. Prepare a simpler path-based version and read the import notes below the preview.
- Edges overlap or small holes close up: reduce bevel width and depth. Remove stray objects or simplify narrow geometry in the editor if needed.
- The file will not load: check that it is valid SVG, keep it below 2 MB, and simplify very detailed artwork. A failed import keeps the current model in place.
- The model is out of view: use Fit model, Front, or 3/4 before importing the SVG again.
For packaging that folds along crease lines, use Fold Studio. For manufacturing, check real-world scale and geometry in your production application; an extrusion preview alone does not establish production dimensions.
Make it yours.
Keep this guide open and give it a try.