How to Generate SVG Vectors with AI
Generate a vector starting point from a specific prompt, then check and refine its paths, colors, and text.
In this guide 6 sections
The AI SVG generator creates vector artwork from a written prompt. Use it to explore an icon, illustration, or graphic direction, then inspect and refine the downloaded result in the SVG editor. Treat the first output as a starting point that still needs your design judgment.
1. Describe a small, clear visual task
A useful prompt specifies the subject, composition, style, and constraints that matter. Start with one main subject instead of an entire scene containing many unrelated elements. Describe the visible result rather than a vague mood alone.
For example: “A simple flat vector icon of a small potted plant, front view, three broad leaves, dark blue pot, green leaves, two or three solid colors, centered composition, no lettering, no shadows.” This gives the generator concrete decisions without requiring exact coordinates.
For a logo exploration, ask for a symbol and add exact wording later as editable text. Generated lettering, geometric precision, and brand consistency may need correction. Avoid treating an attractive preview as proof that every small detail is usable.
2. Choose style and aspect ratio
Select a style preset that suits the intended output, then choose an aspect ratio or leave Auto when you want the model’s default composition. A square composition suits a compact icon, while a wider layout can leave room for a heading beside an illustration.
Keep the prompt consistent with the preset. Asking for both a minimal flat icon and a highly detailed textured scene makes it harder to judge the result. Change one major direction at a time when comparing options.
3. Sign in and review the displayed cost
Generation requires an account with enough credits. Check the balance and the cost shown before choosing Generate Vector. Each new run uses credits; a PRO subscription does not remove the credit requirement.
Prompts are sent for server processing, so use a suitable public or non-sensitive description. This workflow creates new artwork from text. If you need to preserve an existing image’s subject or outline, the image vectorizer is a different starting point.
4. Review the artwork before downloading
Look first at whether the result solves the intended task. Is the subject recognizable at the required size? Are there unwanted decorations or extra parts? Does the composition leave the space you need? Check small details and lettering as closely as the overall impression.
If it misses the goal, revise the prompt with a specific correction, such as fewer leaves, a wider pot, or no background shape. Save a useful result before generating another variation so you can compare them deliberately.
5. Refine the SVG in the editor
Download the SVG and open it in the editor. Choose Ungroup & edit elements when the import is grouped. Replace approximate colors with your chosen values, remove stray shapes, and add exact wording as text where necessary.
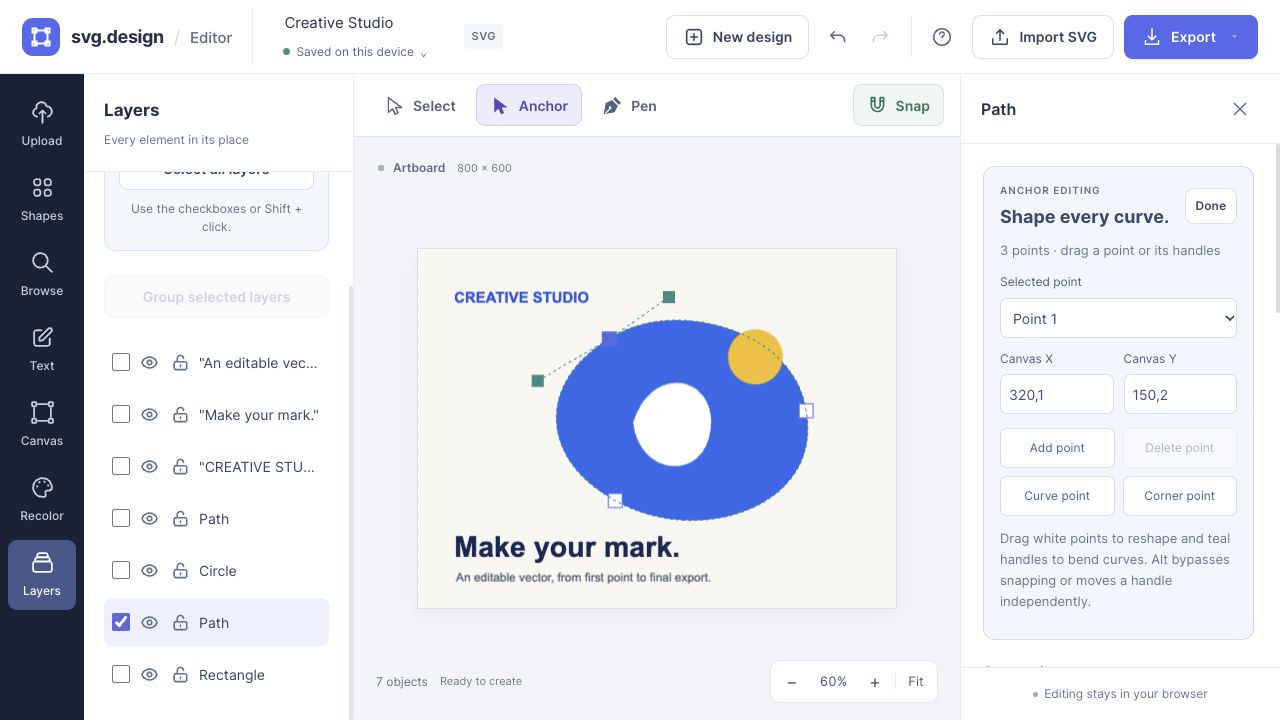
Use Anchor mode for outline corrections and gradient fills for controlled shading. If a design needs a precise multi-element layout, combine it with editor shapes or starters.
Keep an editable master and inspect the delivery file
Export a finished SVG and keep it separate from any optimized or raster copy. Test the artwork at the size and destination where it will appear. If it includes third-party marks, recognizable characters, or other supplied references, check the rights relevant to your intended use rather than assuming generation alone resolves them.
Make it yours.
Keep this guide open and give it a try.